If your Honeywell thermostat isn’t cooling, it’s likely an issue with the cooling system, not the thermostat. If you can see the cooling option but your system refuses to cool, several known issues might be at play. Let’s delve into these problems in this guide. 👇
Addressing these issues should get your cooling system back on track. If problems persist, consult a professional technician for a thorough assessment.
Possible Reasons For A Honeywell Pro Series Thermostat Not Cooling
Troubleshooting Your Cooling Woes:
1. Check Your Filters: Make sure your filters aren’t clogged or dirty; this can hinder proper airflow.
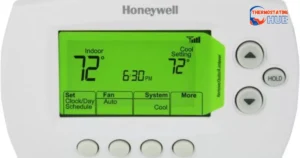
2. Thermostat Settings: Ensure the thermostat is set to the cooling mode with the desired temperature.
3. Power Supply: Confirm that your cooling system has a stable power supply.
4. Circuit Breakers: Examine circuit breakers to ensure none are tripped.
5. Outdoor Unit: Inspect the outdoor unit for debris or any obstructions.
6. Thermostat Placement: The thermostat’s location matters; ensure it’s away from heat sources.
Here’s the information organized into a table format:
| Possible Reasons for Honeywell Pro Series Thermostat Not Cooling |
| 1. Thermostat Settings |
| Ensure the thermostat is set to the cooling mode. |
| Verify the desired temperature setting. |
| 2. Power Supply |
| Confirm a stable power supply to the thermostat. |
| 3. Air Filters |
| Check for clogged or dirty air filters hindering airflow. |
| 4. Circuit Breakers |
| Examine circuit breakers to ensure none are tripped. |
| 5. Outdoor Unit |
| Inspect the outdoor unit for debris or obstructions. |
| 6. Thermostat Placement |
| Ensure the thermostat is away from heat sources. |
Addressing these factors should help identify and resolve issues with your Honeywell Pro Series thermostat not cooling properly. If problems persist, it’s advisable to seek professional assistance for a comprehensive assessment.
Power Issue
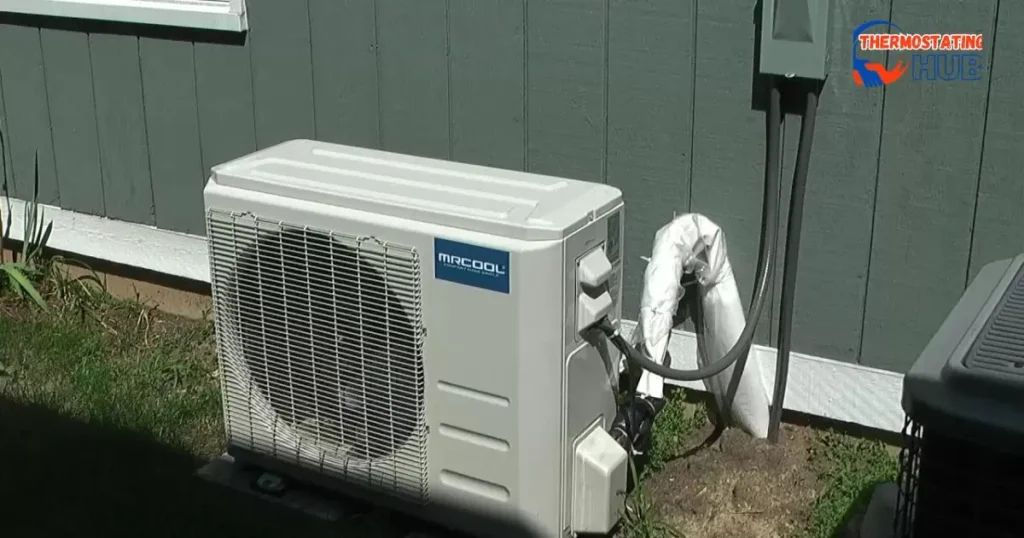
Checking Outdoor Unit and Power Supply:
A great starting point is to verify if the outdoor condenser unit is operational. Turn on the cooling feature on your thermostat and confirm if the outdoor unit is running. If not, check for a tripped circuit breaker, a common culprit.
Power Supply Troubleshooting:
A disconnected power supply can impede the Honeywell ProSeries thermostat, causing cooling glitches. Ensure a consistent power flow for efficient system operation.
1. Power Outage or Electrical Issues:
Confirm if there’s a power outage or electrical problems in your home.
Validate the functionality of other electrical devices.
Wait for power restoration and check if cooling resumes.
2. Circuit Breaker/Fuse Box Inspection:
Examine the thermostat-associated circuit breaker or fuse box.
Ensure the breaker is in the “ON” position, replace any blown fuses.
3. Battery Check for Thermostat:
If battery-powered, inspect the thermostat’s battery status.
Replace batteries if necessary.
Proper Connection to Power Source:
Ensure the Honeywell ProSeries thermostat is correctly linked to the power source to prevent cooling disruptions. Loose connections or faulty wiring can jeopardize the power supply and impact cooling functionality.
Addressing these steps should help diagnose and resolve issues with your thermostat’s cooling function. If problems persist, consult a professional technician for further assistance. 🛠️
Read Also: Honeywell Purge Light Blinking?
Bad Capacitor
Troubleshooting AC Capacitor Issues:
Another potential cause for your Honeywell thermostat not cooling could be a faulty AC capacitor. Modern AC units often have duo capacitors that power both the fan motor and the compressor.
1. Function of Duo Capacitors:
Duo capacitors power both the fan motor and the compressor.
2. Impact of a Bad Capacitor:
When the part powering the compressor fails, the fan may still run, but the compressor won’t function.
Resulting in no cooling, akin to having the fan running without cooling.
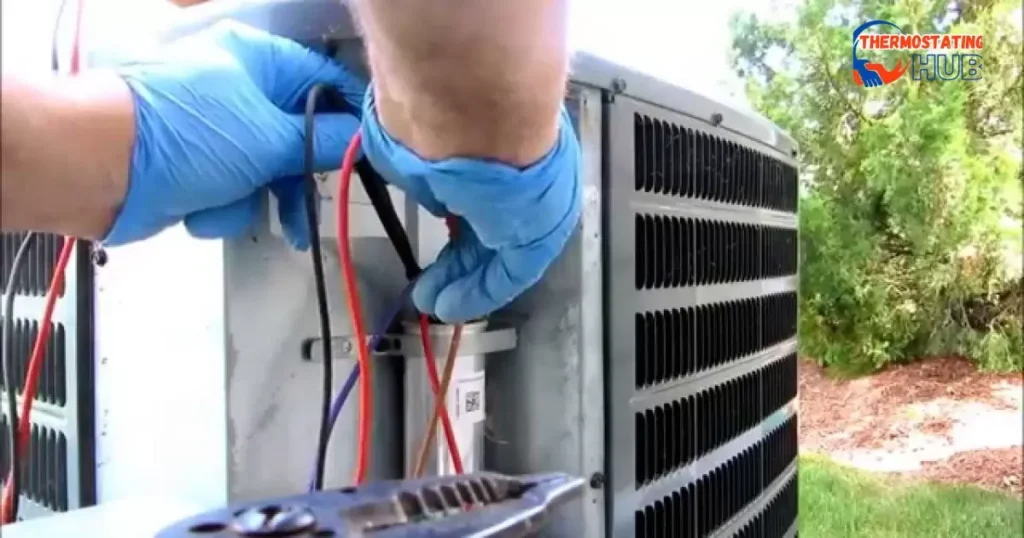
3. DIY Capacitor Testing:
For DIY enthusiasts, consider testing the capacitor for continuity by opening the condenser unit.
Prioritize safety precautions: turn off unit power and discharge the capacitor before handling.
4. Identifying a Dead Capacitor:
A dead capacitor may have a visibly bulged top, indicating potential failure.
5. Replacement Considerations:
Dead capacitors are replaceable and cost-effective when purchased online.
Ensure to check the capacitor model before ordering a replacement.
Taking these steps can help determine if a faulty AC capacitor is causing your cooling issues. If you’re uncertain or uncomfortable with DIY tasks, it’s advisable to seek professional assistance for capacitor replacement. ⚙️
Compressor Lock Out and Solutions:
There are instances when the capacitor operates smoothly, the fan spins, yet the compressor remains inactive, referred to as compressor lockout. This issue is prevalent in older systems, signaling a potential need for a new unit.
1. Consideration for Replacement:
Compressor lockout, especially in aging systems, often suggests the need for a new unit.
2. Alternative: Hard Start Kit:
If purchasing a new unit isn’t feasible, consider a hard start kit to prolong the compressor’s operation.
Note that this is a temporary solution, offering about a year or two of relief before the issue resurfaces.
Facing compressor lockout underscores the age-related challenges of older systems. While a hard start kit can provide a short-term remedy, it’s essential to weigh the long-term benefits against the eventual need for a more permanent solution.
Bad Condenser Fan Motor
Condenser Fan Motor Woes:
If your Honeywell AC isn’t cooling, a potential culprit might be a faulty condenser fan motor. This motor can seize up, halting its rotation, even if you hear the compressor running.
1. Symptom Stalled Fan with Running Compressor:
The condenser fan motor may seize, leading to a lack of rotation, despite the compressor’s operation.
2. Limited Solutions: Replacement Recommended:
Unfortunately, if faced with this issue, little can be done beyond replacing the fan motor.
Even attempts to oil the motor won’t resolve the problem.
3. Recommendation Full Motor Replacement: In such cases, the most effective solution is to replace the entire condenser fan motor.
While it may be an inconvenience, opting for a full replacement ensures the efficient functioning of your Honeywell AC system, restoring the cool comfort you seek.
Dirty Air Filter
Air Filter Woes:
A prevalent issue impeding your Honeywell thermostat’s cooling prowess is dirty air filters. These filters act as guardians, shielding the evaporator coil and your home from unwanted particles.
1. Air Filter Functionality: Filters prevent dirt and particles from reaching the evaporator coil and entering your home.
2. Culprit: Dirty and Clogged Filters: When these filters get dirty and clogged, they hinder airflow, disrupting the cooling process.
3. Maintenance Recommendations:
Government guidelines recommend replacing HVAC air filters every 12 months of use.
Regular replacements not only enhance air quality but also ensure your HVAC system operates optimally.
Adhering to these maintenance practices ensures a steady flow of cool air from your HVAC system and promotes a healthier indoor environment. 🌬️
Plugged Evaporator Coil.
Evaporator Coil Woes:
Another potential culprit for your Honeywell Pro Series not cooling is a clogged evaporator coil. Despite a clean filter, the coil can accumulate dirt over time, impeding its functionality.
1. Airflow Restriction and Cooling Impacts:
Accumulated dirt on the evaporator coil restricts airflow, diminishing its cooling efficiency.
Excessive buildup can lead to the coil freezing, exacerbating the cooling problem.
2. Identification of Issues: Look for signs of ice buildup on the coil as an indicator of potential problems.
3. Challenges in Cleaning:
Cleaning the coil is often challenging as it is typically hard to access.
Disassembling the plenum, and the sheet metal surrounding the coil is required.
4. Professional Assistance:
Opting for professional assistance, such as a duct cleaning company, is often the most effective solution.
They can efficiently clean the coil, ensuring optimal cooling performance.
While cleaning the evaporator coil can be a tedious task, professional services can make the process smoother, restoring your Honeywell Pro Series to efficient cooling. ❄️
Plugged Up Condenser Coil
Condenser Coil Maintenance Tips:
The condenser coil, situated outdoors, plays a crucial role in your cooling system. It takes air from the sides and expels it from the top, rejecting the heat collected from inside the house.
1. Airflow Restriction Caution:
A dirty condenser coil, filled with debris like grass, dirt, cottonwoods, and seeds, can impede airflow.
This restriction hinders the unit’s cooling efficiency.
2. Hidden Dirt Concerns: Despite a clean exterior, the coil may harbor dirt between the fins, affecting performance.
3. DIY Cleaning Method: Regular cleaning is essential. Using a hose and a water supply, you can easily clean the condenser coil. Ensure the power is turned off before removing grills for safety.
Remember, a clean condenser coil ensures optimal airflow, contributing to efficient cooling. Regular maintenance can prevent issues and keep your Honeywell thermostat operating smoothly. 🌬️
Bad Thermostat
Thermostat Troubles:
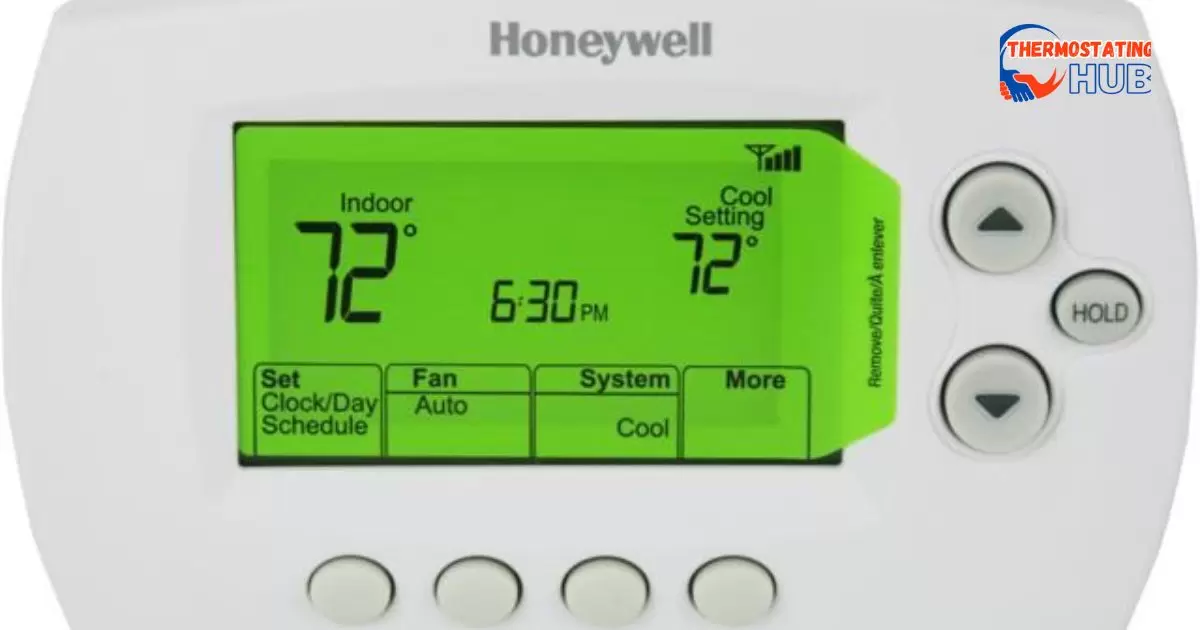
A malfunctioning thermostat can be a significant hindrance to your cooling system’s performance. If your Honeywell thermostat is causing issues, it might manifest in various ways.
1. Temperature Discrepancies:
A faulty thermostat may display incorrect temperatures, leading to ineffective cooling.
2. Failure to Activate AC:
In some cases, the thermostat may fail to trigger the air conditioner when needed.
3. Simple Battery Fix:
Fortunately, changing the batteries might solve the problem if the thermostat is battery-operated.
4. Potential Replacement:
If issues persist, replacing the thermostat might be necessary.
5. Diagnostic Bypass Test:
To identify if the thermostat is the culprit, a diagnostic bypass test can be performed.
Remove the thermostat from the wall and place a jumper wire between Y and R to check if the air conditioner responds.
Ensuring your thermostat operates accurately is crucial for effective cooling. If uncertainties persist, battery replacement or a new thermostat might be the solution. 🔧
High Outdoor Temperature
Managing Cooling Expectations in High Temperatures:
In scorching weather conditions, the timing of when you activate your thermostat for cooling can significantly impact its effectiveness.
1. Prompt Activation in Intense Heat:
If the external temperature soars to 110 degrees, waiting until your home reaches 90 degrees before turning on the AC may lead to a prolonged cooling process.
2. Efficiency Challenges:
Allowing the indoor temperature to rise substantially before initiating the air conditioner can result in a prolonged catchup period.
Even with the air conditioner functioning correctly, it might take the entire day and night to reach the desired temperature.
3. Proactive Cooling Approach:
To optimize cooling efficiency during heatwaves, consider turning on the air conditioner earlier when the outdoor temperatures are at their peak.
Ensuring an early start to cooling when facing extreme external temperatures enables your system to operate more efficiently and maintain a comfortable indoor climate.
Low Refrigerant
Addressing Low Refrigerant Issues:
Encountering low refrigerant levels in your air conditioning unit is a serious concern, and it’s essential to approach it with caution.
1. Not a DIY Fix:
Low refrigerant is a complex issue that homeowners cannot resolve independently.
2. Permanently Sealed System Clarification:
The air conditioner operates as a permanently sealed system, and the refrigerant or freon inside is designed to last for the entire lifespan of the unit, be it 20 or 30 years.
3. Indication of a Leak:
If there’s a need to add refrigerant, it suggests a potential leak in the system, requiring professional attention.
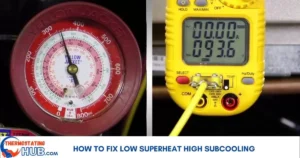
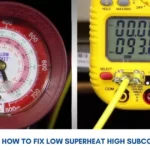
4. SelfCheck for Refrigerant Issues:
Homeowners can perform two checks to identify potential refrigerant problems:
Examine the suction line, the thicker copper line running through the unit. Under normal conditions, it should be sweating or condensing. A frozen or dry suction line may indicate low refrigerant.
Check the temperatures in the return and supply ducts and note the temperature difference (delta). It should typically be between 15 and 20 degrees.
5. Professional Inspection and Charging:
If suspicions of low refrigerant persist, it’s crucial to contact professionals. They can assess the system, identify any leaks, and charge the refrigerant if necessary.
Remember, dealing with refrigerant issues requires expertise, and professional intervention is the safest course of action.
Addressing Low Refrigerant Issues:
Encountering low refrigerant levels in your air conditioning unit is a serious concern, and it’s essential to approach it with caution.
1. Not a DIY Fix:
Low refrigerant is a complex issue that homeowners cannot resolve independently.
2. Permanently Sealed System Clarification:
The air conditioner operates as a permanently sealed system, and the refrigerant or freon inside is designed to last for the entire lifespan of the unit, be it 20 or 30 years.
3. Indication of a Leak:
If there’s a need to add refrigerant, it suggests a potential leak in the system, requiring professional attention.
4. SelfCheck for Refrigerant Issues:
Homeowners can perform two checks to identify potential refrigerant problems.
Examine the suction line, the thicker copper line running through the unit. Under normal conditions, it should be sweating or condensing. A frozen or dry suction line may indicate low refrigerant.
Check the temperatures in the return and supply ducts and note the temperature difference (delta). It should typically be between 15 and 20 degrees.
5. Professional Inspection and Charging:
If suspicions of low refrigerant persist, it’s crucial to contact professionals. They can assess the system, identify any leaks, and charge the refrigerant if necessary.
Remember, dealing with refrigerant issues requires expertise, and professional intervention is the safest course of action.
Leaks In The Ducts
Ductwork inspection for Efficient Cooling:
Inefficient cooling can sometimes be traced back to issues with the ductwork, necessitating a thorough inspection.
1. Cracks and Disconnections:
Ductwork, especially in areas near ceilings, may develop cracks or become disconnected, affecting the airflow.
2. Common Occurrence in Attics:
This problem is prevalent in attics, particularly with flexible ductwork. Rips or disconnections can lead to air escaping into the attic instead of reaching the living spaces.
3. Impact on Cooling Efficiency:
Lopsided airflow, directing cooled air into the attic, diminishes the cooling effect inside the home.
4. Importance of Duct Inspection:
Regularly inspect all accessible ducts, especially the supply duct responsible for pumping out cold air.
Ensure there are no visible cracks, disconnections, or other issues that may compromise efficient cooling.
By proactively addressing and repairing any ductwork issues, you can maximize the effectiveness of your cooling system, ensuring that the cold air is directed precisely where it’s needed.
Unlocking Solutions Honeywell Thermostat Pro Series Not Cooling Key Takeaways
Unlock solutions for a Honeywell Thermostat Pro Series not cooling. 🌡️ Here are essential insights:
1. Check Your Settings: Ensure your thermostat is set to the cooling mode and the desired temperature. Sometimes, a simple adjustment can make a big difference.
2. Inspect Air Filters: Dirty filters can impede airflow, affecting cooling efficiency. Regularly clean or replace them to keep your system running smoothly.
3. Examine Ventilation: Obstructed vents or blocked airflow can hinder cooling. Double-check that vents are open and unobstructed for optimal performance. 💨
4. Verify Power Sources: Make sure your thermostat has power and the circuit breaker for your HVAC system is not tripped. Power issues can lead to cooling problems.
5. Update Firmware: Check for thermostat firmware updates. Sometimes, outdated software can cause glitches. Update to the latest version for improved performance.
6. Temperature Sensor Calibration: Calibrate the thermostat’s temperature sensor to ensure accurate readings. Inaccurate readings may lead to improper cooling cycles.
7. Professional Inspection: If issues persist, consult a professional HVAC technician to inspect and address any underlying problems. Professional expertise can uncover hidden issues.
Remember, regular maintenance enhances your thermostat’s performance and keeps your home comfortable. Stay cool! 😎
Navigating Challenges Pros and Cons of Honeywell Thermostat Pro Series Not Cooling Fixes
Navigating challenges with the Honeywell Thermostat Pro Series can be a mix of advantages and disadvantages, particularly when addressing cooling issues. On the positive side, the Pro Series offers advanced features and precise temperature control.
However, users may encounter challenges with cooling functions. One pro fix is the ability to troubleshoot and adjust settings easily. On the downside, some users report issues that may require professional assistance. It’s essential to weigh these pros and cons to determine the best course of action for an optimal cooling experience.
| Pros | Cons |
| Advanced features | Cooling issues reported |
| Precise temperature control | Professional assistance may be needed |
| Easy troubleshooting |
Mastering Control Expert Tips to Maintain and Prevent Honeywell Thermostat Pro Series Not Cooling Issues”
Navigating the world of the Honeywell Thermostat Pro Series brings both perks and challenges, especially when it comes to tackling cooling issues. On the positive side, the Pro Series stands out with its advanced features and precise temperature control. It’s like having a smart assistant for your climate preferences. The bonus is the user-friendly troubleshooting option – a handy tool for those minor hiccups.
However, not every journey is smooth. Some users have reported cooling issues that might give you a bit of a headache. The silver lining is the thermostat’s user-friendly interface that allows you to troubleshoot and tweak settings with ease. Yet, on the downside, there are cases where professional assistance becomes the superhero fix. So, while the Pro Series offers an array of features, it’s crucial to weigh these advantages and disadvantages to ensure your cooling experience stays as cool as intended.
Answers To Key Questions
How do I fix my Honeywell thermostat not cooling?
Check if the thermostat is set to the cooling mode, ensure the desired temperature is lower than the current room temperature, and inspect for any wiring issues.
Why is my AC fixed but not cooling?
Verify if the thermostat settings are correct, check for clogged air filters, and ensure there are no issues with the refrigerant levels or the compressor.
Why is my thermostat not switching to cool?
Examine if the thermostat is set to the cooling mode, inspect for faulty wiring or connections, and consider recalibrating temperature settings.
Why is my Honeywell thermostat not running AC?
Ensure the thermostat is powered on, check for blown fuses or tripped circuit breakers, and confirm that the thermostat is correctly wired to the HVAC system.
Final Thoughts
In the quest to conquer cooling challenges with your Honeywell Thermostat Pro Series, you’ve just embarked on a journey of troubleshooting mastery. Whether it’s addressing thermostat settings, checking filters, inspecting power supplies, or diving into the intricacies of your HVAC system, this guide has armed you with the knowledge to reclaim the cool comfort you seek.
As you venture forth to conquer the cooling conundrums, keep in mind that the complete article is your ultimate companion on this HVAC odyssey. Your journey doesn’t end here; it’s merely a pit stop in the pursuit of a consistently cool and comfortable living space. So, dive into the complete guide for a more in-depth understanding of your Honeywell Thermostat Pro Series and emerge as the master of your HVAC domain.
Stay cool, stay informed! 😎

I’m Dariel Campbell, the HVAC maestro at thermostatinghub.com. I’m not just about fixing air conditioners; I’m your cooling confidant. As a problem-solving storyteller, I dive into the world of HVAC with a passion for unraveling dilemmas. Join me on a journey where your comfort is the plot twist we’re all waiting for!