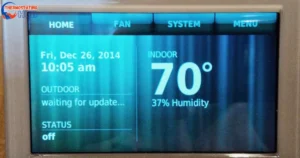
![White Rodgers Thermostat Wiring to Nest [How To]](https://thermostatinghub.com/wp-content/uploads/2023/12/white-rodgers-thermostat-wiring-to-nest-how-to.webp)
If you’ve got a White Rodgers thermostat but are eyeing the cool features of a Nest thermostat, you’re in luck! This guide will walk you through the process, giving you step-by-step instructions on connecting your White Rodgers thermostat to a Nest.
By doing so, you’ll level up your home’s comfort and energy efficiency with the latest smart home technology. Ready to dive in? 🚀
Making the switch to a Nest thermostat not only brings you modern convenience but also enhances your home’s overall efficiency. Say goodbye to outdated controls and hello to a more comfortable and smart living space.
Let’s explore the steps together and unlock a new era of home climate control!
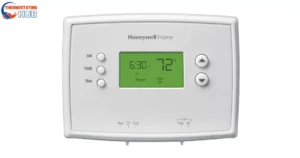
White Rodgers Thermostat Wiring to Nest [7 Easy Steps]
![White Rodgers Thermostat Wiring to Nest [7 Easy Steps]](https://thermostatinghub.com/wp-content/uploads/2023/12/white-rodgers-thermostat-wiring-to-nest-7-easy-steps-1024x538.webp)
Whether your White Rodgers thermostat is an old Mercury model or not, the wiring principle for connecting it to a Nest thermostat remains pretty much the same.
Remember, if you’re not comfortable or unsure about the process, it’s always best to call a qualified local technician. However, if you decide to tackle it yourself, the task shouldn’t take more than half an hour.
For a mercury thermostat, you’ll usually need to take off the cover housing the adjusting knob and the second plate housing the mercury. Once you’ve done that, you can access the actual wire plate. Let’s walk through the steps:
Step 1: Turn off the Power
Before diving into any wiring, make sure to turn off the power to your HVAC system by flipping the circuit breaker. This prevents any fuse mishaps and ensures your safety. Once the power is off, head over to your thermostat and gently snap off the cover.
Remember, safety first! By cutting the power, you’re not only protecting your system but also yourself. Now, let’s unveil the thermostat’s internals and get ready to make the necessary connections for a smarter home climate control system.
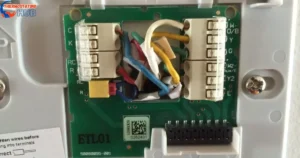
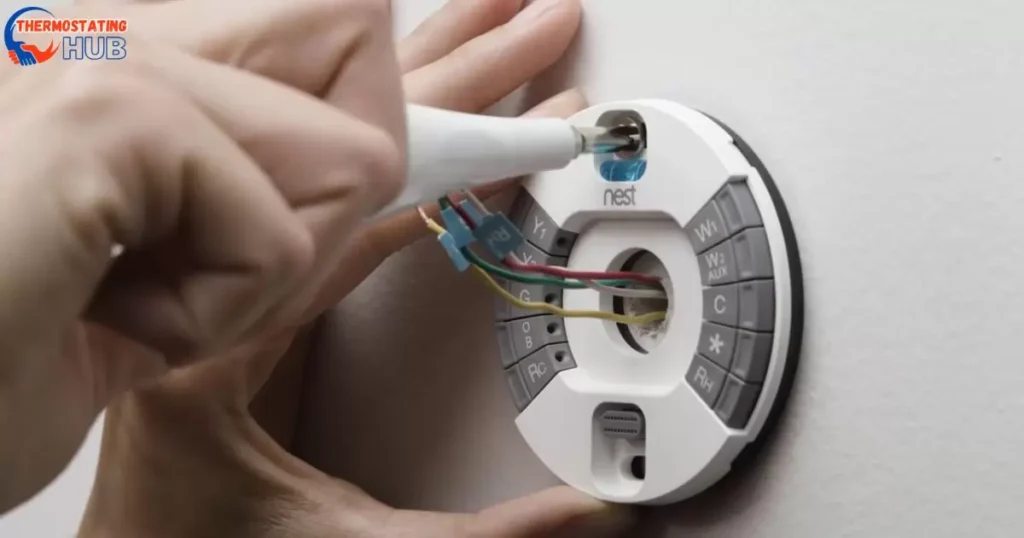
Step 2: Take Note of Existing Wiring
Start by clipping off the covers. Once the main cover is off, you might spot the second one housing the mercury (only for mercury thermostats). If you’ve got a non-mercury thermostat, the wiring should be visible right away.
Now, whether you’re looking at wires or mercury, here’s the key step: document it! Take a clear picture or jot down the existing wiring connections on your White Rodgers thermostat. Match each wire to its corresponding label, as seen in this image. Grab those sticker labels from the Nest installation kit and tag each wire according to its map.
Capturing the existing setup is like creating a roadmap. It ensures a smooth transition to the Nest thermostat a little effort now for a lot of comforts later!
Step 3: Remove old thermostat
To take off the White Rodgers thermostat from the wall, simply unscrew it from the wall plate. Here’s a crucial tip: don’t solely rely on wire colors. It’s essential to label them according to how they were originally wired.
As you bid farewell to the old thermostat, remember that proper labeling ensures you won’t miss a beat when connecting the new Nest thermostat. Let’s make this transition smooth and foolproof!
Step 4: Install Nest Thermostat Base
Stick to the Nest-provided installation guide for mounting the Nest thermostat base on the wall. The installation kit typically includes a built-in level, so there is no need to stress about getting it perfectly level.
Nest has your back with straightforward instructions and handy tools. As you affix the base, the built-in level ensures a picture-perfect placement. Easy peasy, right? Now, let’s move on to the next step and bring that smart home upgrade to life!
Read More: Carrier Furnace Codes 34 and 14
Step 5: Connect Nest Thermostat Wiring
Grab your screwdriver and secure the Nest backplate to the wall.
Now, using the handy wiring labels provided by Nest, let’s connect the wires from your White Rodgers thermostat to the corresponding terminals on the Nest thermostat base. Here’s the usual wiring roadmap:
- White Rodgers “R” wire to Nest “R” terminal (power)
- White Rodgers “W” wire to Nest “W” terminal (heat)
- White Rodgers “Y” wire to Nest “Y” terminal (cool)
- White Rodgers “G” wire to Nest “G” terminal (fan)
- White Rodgers “C” wire to Nest “C” terminal (common)
Note: Your White Rodgers thermostat might not typically have a “C” wire. From my experience, I recommend getting the Nest power connector for your Nest thermostat. This helps avoid future cooling or heating hiccups.
Connecting the wires is like putting pieces of a puzzle together. With each wire finding its home in the Nest, you’re one step closer to a smarter, more efficient home. Let’s keep the momentum going!
Step 6: Attach Nest Thermostat
Slot the Nest thermostat onto the base by aligning it properly and gently pressing until it clicks securely into place.
The satisfying click means you’ve successfully married the Nest thermostat to its base. Your home is getting smarter, one click at a time!
Step 7: Restore Power
Time to bring the power back to your HVAC system! Flip the circuit breaker back on to get things up and running.
With the power back on, your HVAC system is ready to embrace its upgraded companion, the Nest thermostat. Get ready to enjoy a new level of comfort and control in your home!
Step 8: Set Up Nest Thermostat
Now, let’s wrap it up! Follow the clear on-screen instructions on your Nest thermostat to breeze through the setup process. This includes connecting it to your Wi-Fi network and configuring your preferred settings.
The on-screen guidance makes the setup a walk in the park. Your Nest thermostat is almost like a personal assistant, ready to cater to your comfort preferences. Let’s finish strong and revel in the smart home vibes! 🚀
Unlocking White Rodgers Thermostat Wiring Magic: Key Takeaways for Nest Installation
Unleashing the magic of White Rodgers thermostat wiring for Nest installation holds some key takeaways:
- Snap, Label, and Click: Begin by snapping off covers, label wires meticulously, and click the Nest thermostat securely onto its base.
- Power Play: Before any wiring wizardry, power down your HVAC system by flipping the circuit breaker off. Safety first!
- Wiring Wisdom: Follow Nest’s provided labels and connect the wires smartly – R for power, W for heat, Y for cool, G for fan, and C for common.
- Click and Connect: Attach the Nest thermostat to its base with a satisfying click, marking the union of smart technology and your home.
- Power On, Smart Home On: Flip the circuit breaker back on and let the Nest thermostat power up for smarter, more comfortable living.
- On-Screen Bliss: Follow the on-screen Nest instructions for the final touch – connecting to Wi-Fi and setting up preferences.
Congratulations! You’ve mastered the art of Nest installation, turning your home into a haven of smart comfort.
Navigating the Wiring Web: Pros and Cons of Upgrading to Nest with White Rodgers Thermostat
Embarking on the journey of upgrading to Nest with a White Rodgers thermostat involves navigating through a wiring web. Let’s explore the pros and cons:
Pros:
- Smart Efficiency: Nest brings intelligent climate control, adapting to your habits for energy-efficient heating and cooling.
- User-Friendly Installation: With clear instructions and labeled wires, the installation process is user-friendly, even for beginners.
- Remote Access: Control your home’s temperature from anywhere using the Nest app, adding a layer of convenience to your life.
- Sleek Design: Nest’s modern design adds a touch of sophistication to your home, replacing outdated thermostat aesthetics.
Cons:
- Compatibility Check: Ensure compatibility between your White Rodgers thermostat and Nest, as older models might need additional accessories.
- Initial Cost: While the long-term energy savings are notable, the upfront cost of a Nest thermostat might be higher than traditional thermostats.
- Dependency on Wi-Fi: For full functionality, Nest relies on a Wi-Fi connection. If your Wi-Fi is unreliable, it could impact performance.
- Learning Curve: Adjusting to a smart thermostat might take some time, especially for those accustomed to traditional thermostats.
Navigating the wiring web is a journey, and with Nest, you’re stepping into a world of smart comfort. Choose wisely, and embrace the future of home climate control!
Mastering Thermostat Harmony: Expert Tips for White Rodgers to Nest Wiring [How To]
![Mastering Thermostat Harmony: Expert Tips for White Rodgers to Nest Wiring [How To]](https://thermostatinghub.com/wp-content/uploads/2023/12/mastering-thermostat-harmony-expert-tips-for-white-rodgers-to-nest-wiring-how-to-1024x538.webp)
Learn how to connect your White Rodgers thermostat to a Nest thermostat effortlessly with our expert tips. Follow our step-by-step guide to ensure a smooth wiring process and optimal thermostat harmony in your home. We’ve simplified the instructions to make it easy for you to upgrade and enjoy the benefits of a Nest thermostat. Read on for a hassle-free transition!
And here’s a simple table you can use:
| White Rodgers Wire Color | Nest Wire Color |
| Red | Red |
| White | White |
| Green | Green |
| Blue | Blue |
This table provides a quick reference for matching the wire colors from your White Rodgers thermostat to the corresponding colors on the Nest thermostat.
FAQs
Where does the white wire go on the Nest thermostat?
The white wire typically connects to the “W1” terminal on a Nest thermostat. This wire controls the heating function of your HVAC system, often associated with the furnace.
Does the R wire go to RC or RH?
The R wire usually connects to the “RH” terminal on a Nest thermostat. However, if you only have one R wire, it can go to either RH or RC since they are often bridged internally on Nest thermostats.
What wires should be connected to Nest?
The wires to connect to your Nest thermostat depend on your HVAC system. Generally:
- R (power)
- C (common)
- W1 (heat)
- Y1 (cooling)
- G (fan)
Additional wires like W2, Y2, and others may be used for more complex systems.
What are W1 and W2 on a thermostat?
W1 and W2 on a thermostat represent different stages of heating. W1 is the first stage, while W2 is the second stage for additional heating capacity. This is common in systems with auxiliary heating, such as heat pumps.
Final Thoughts
In a nutshell, transitioning from a White Rodgers to a Nest thermostat is like giving your home a smart, energy-efficient makeover. With simple steps like snapping off covers, labeling wires, and clicking the Nest securely into place, you’re not just upgrading your thermostat; you’re ushering in a new era of comfort and control.
Remember, this article provides a sneak peek into the process Reading the full guide ensures you’re armed with all the details for a seamless transition. So, gear up, follow the steps, and let your home embrace the magic of smart climate control!
Thank you for taking the time to read this article! If you have any additional questions or need further assistance, please don’t hesitate to ask. I appreciate your engagement!

I’m Matthew Porter, the HVAC enthusiast at thermostatinghub.com. Beyond being a writer, I’m your dedicated problem solver for all things heating and cooling. Join me on my blog for a storytelling adventure through the HVAC universe. Together, let’s transform your comfort challenges into tales of coziness!