![Nest Thermostat Not Blowing Cold Air [Easy Fixes]](https://thermostatinghub.com/wp-content/uploads/2023/12/nest-thermostat-not-blowing-cold-air-easy-fixes.webp)
Have trouble with your Nest thermostat not cooling your space? No worries! This guide dives into why your Nest thermostat might not be blowing cold air and offers steps to troubleshoot and fix the issue.
Often, when your Nest thermostat isn’t blowing cold air, it’s due to various reasons. Incorrect thermostat settings, dirty air filters, wrong wiring, issues with the condenser unit, or even leaks in the ductwork system can be the culprits.
Let’s quickly glance at these possible issues in the table below before jumping into troubleshooting steps to get your Nest cooling again.
Pro Tip: Regularly maintaining your HVAC system by cleaning filters and checking wiring can prevent many thermostat-related issues, ensuring consistent cooling performance.
8 Possible causes for a nest thermostat not blowing cold air
| Possible Cause | The Fix |
| Incorrect thermostat setting | Set your thermostat to cool |
| Thermostat delay | Wait for 5 minutes |
| Dirty air filters | Clean or replace filters |
| Wrong thermostat wiring | Check wiring, ensure correct installation |
| Low or leaking refrigerant | Consider recharging your system |
| Power issues with the condenser unit | Check power ‘switching’ points for the condenser |
| Damaged ductwork | Seal off the duct system |
Now, let’s delve deeper into each of the issues outlined in the table above.
Incorrect thermostat setting
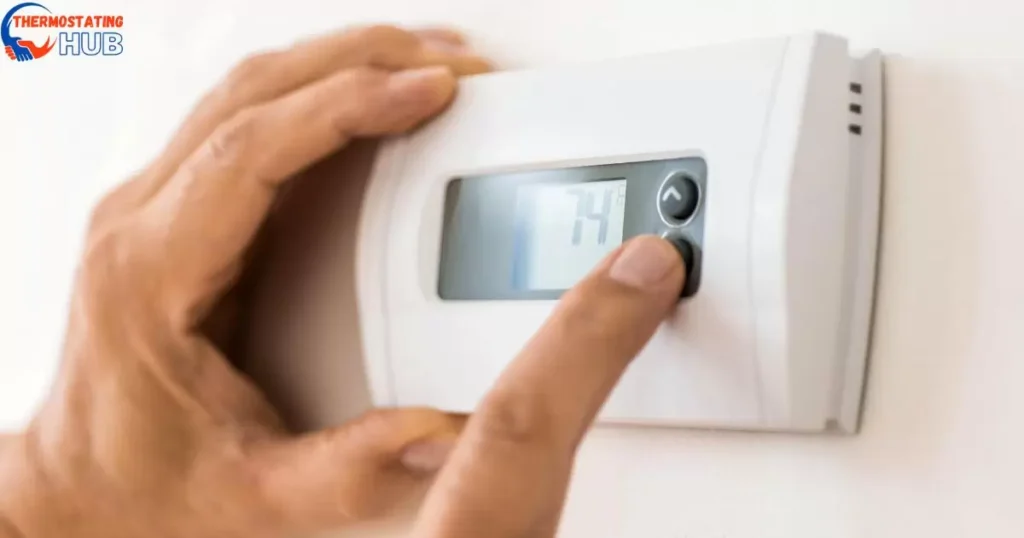
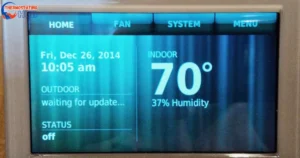
Is your Nest not blowing cold air? Before diving into any troubleshooting procedures for your thermostat and AC system, make sure to verify that your thermostat settings are correct.
Ensure your thermostat is set to cool and the fan is set to auto. This step is crucial because if your system isn’t set to cool, particularly in the case of a heat pump system, it won’t blow cold air regardless of how much you adjust the temperature settings.
After confirming the correct thermostat settings, if your system still doesn’t blow cold air, wait for at least 5 minutes. Sometimes, your system might be in a delay mode, and a short wait might just resolve the issue.
Thermostat delay
If your Nest thermostat isn’t blowing cold air, waiting for at least 5 minutes might be necessary. This delay mode feature, common in most thermostats, prevents HVAC equipment from starting too quickly after a shutdown or power loss.
This delay is vital as it stops the AC from blowing cold air immediately after a power cut, protecting the compressor from short cycling and potential damage. Just give it a few minutes before delving into further troubleshooting.
If, after the 5-minute wait, your vents still aren’t blowing cold air, it’s time to inspect your air filter.
Pro Tip: Regularly changing your air filter can improve your HVAC system’s performance and prevent issues like this from occurring frequently. 👍
Dirty air filters
Dirty filters cause numerous issues with your Nest thermostat, including preventing your AC from cooling.
Head over to the air handler and check the blower compartment, where the air filter usually sits. Take out the filter and hold it up to the light.
If you can see the light passing through, it’s time for a replacement. Sometimes, even if the filter isn’t clogged, a good look can reveal whether it needs changing.
Swapping out a clogged or dirty air filter typically resolves these issues. If you’ve replaced the filter and suspect it’s not the culprit behind your Nest’s airflow problem, consider examining the thermostat wiring.
Pro Tip: Regularly inspecting and replacing air filters ensures your HVAC system runs efficiently and helps avoid problems like insufficient cooling due to clogged filters. 🌬️
Read also: How to Reset Dometic Thermostat?
Wrong thermostat wiring
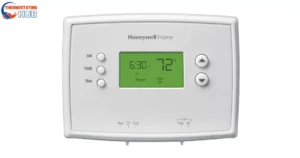
Is this a new thermostat installation? If it is, there might have been an error during the installation process. Specific wires must remain connected when upgrading from a Honeywell or any other thermostat to a Nest thermostat to ensure proper functionality.
Among these wires are the OB wires, responsible for the four-way reversing valve. The OB terminal manages the reversing valve, which is crucial for your heat pump to cool or heat your home as needed. In a Honeywell setup, this is often labeled as the W wire, which should be connected to the OB connector on your Nest thermostat.
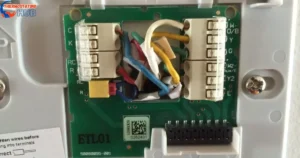
Other vital terminals that require proper connections include:
- Y terminal: controls the stage 1 compressor relay
- Y2 terminal: manages the stage 2 compressor relay
- C-wire (or the blue wire): supplies constant power to your thermostat, especially if it uses Wi-Fi
- R wire: provides power for cooling.
For a clearer understanding of your Nest wiring, refer to this guide. 📑
Pro Tip: When installing a new thermostat, carefully follow the wiring instructions to ensure all necessary connections are accurately made, avoiding potential issues with your HVAC system. 🛠️
Power issues with the condenser unit
Ensure the outdoor condenser unit has a power connection by following these steps:
Begin by inspecting the electrical breaker box for any tripped switches. Look specifically for the A/C switch and reset it if it’s tripped.
Next, attempt to activate cooling from your thermostat. Check if the outdoor unit is running. If it’s not, head outside and inspect the disconnect to see if it’s intact.
The disconnect serves as an outdoor switch for your AC, allowing professionals to cut power during maintenance. Sometimes, it might have been left disconnected.
If the disconnect is in place but the condenser isn’t running, there might be issues with the AC contactor or the AC capacitor within the condenser.
The contactor and capacitor can be quickly and affordably replaced, potentially resolving the problem.
Pro Tip: Regularly checking your outdoor condenser unit for proper power connection and ensuring all switches are intact can prevent potential cooling issues with your HVAC system, saving you time and money on repairs. 💡
Low or leaking refrigerant
A common issue hindering your Nest thermostat from blowing cool air is low or leaking refrigerant, a prevalent reason for this behavior.
Refrigerant, a chemical used in air conditioning and refrigeration, facilitates cooling or heat in heat pump systems through evaporation and condensation aided by a compressor.
During evaporation, it absorbs heat from your indoor space and releases it into the air when it condenses in the condenser coils.
Ideally, refrigerant operates in a closed system without diminishing. However, over time, the system might develop leaks, causing the refrigerant to escape and resulting in a lack of cooling in your home.
If you suspect a refrigerant leak, it’s crucial to contact licensed professionals for assistance. They can locate and seal off any leaks using specialized detection tools, ensuring optimal system performance.
Pro Tip: Regular maintenance and prompt detection of refrigerant leaks can prevent cooling issues, prolong the life of your HVAC system, and ensure efficient operation.
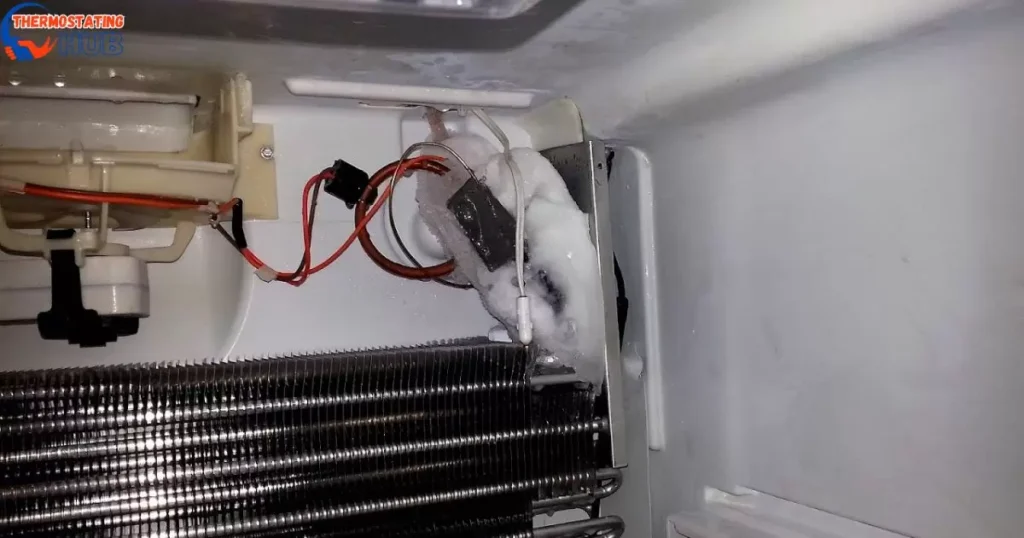
Defective fan blower
Head to the air handler and see if the air blower spins when your Nest is set to cool. If it doesn’t, power off the system using the switch and attempt to spin it manually.
If the blower struggles or fails to spin, it might be defective.
As a DIY measure, you can test the blower motor for continuity. If there’s no continuity, you may need to replace either the fan blower capacitor or relays. Fortunately, both components are affordable and easily replaceable.
Pro Tip: Regularly checking and maintaining your HVAC system’s components, such as the air blower, can help identify potential issues early, allowing for timely and cost-effective solutions to keep your system running smoothly. 🛠️
Effortless Solutions for Nest Thermostat Not Cooling
Have trouble with your Nest thermostat not cooling? Here are some simple fixes that might help:
- Check Your Settings: Ensure that your Nest thermostat is set to “cool” mode and that the temperature is set lower than the current room temperature. Sometimes, incorrect settings can prevent the AC from turning on.
- Power Cycle the Thermostat: Try turning off the thermostat by switching it off in the settings or removing it from the base for a few minutes. Then, reattach it or turn it back on. This can sometimes resolve minor software glitches.
- Check Power and Connections: Ensure that the thermostat is receiving power. Check the wires and connections to see if everything is properly connected. Loose connections can cause the cooling system to malfunction.
- Clean or Replace Air Filters: Dirty or clogged air filters can restrict airflow and affect cooling. Remove and clean the filters if reusable, or replace them if they are disposable.
- Verify Room Temperature: Double-check the actual room temperature using a separate thermometer. Sometimes, the thermostat’s sensor might be reading the wrong temperature, causing the cooling system not to activate.
- Check for System Compatibility: Ensure that your Nest thermostat is compatible with your HVAC system. Incompatibility can lead to cooling issues.
- Schedule a Professional Inspection: If none of the above solutions work, it might be time to call a professional HVAC technician. They can diagnose any underlying issues with your cooling system or thermostat that require expert attention.
Remember, while these solutions can often resolve simple issues causing the Nest thermostat not to cool properly, it’s essential to prioritize safety when dealing with electrical systems. If you’re unsure, consulting a professional is the best course of action.
Read aslo: No Condensation from AC And No Cooling
Pros and Cons of Addressing Nest Thermostat Cold Air Issues
Certainly! Here’s an expanded version of the table, followed by the descriptive content:
| Pros | Cons |
| Efficient Heating Control | Potential Cost of Repairs |
| Improved Comfort | Time-Consuming Troubleshooting |
| Energy Savings | Difficulty in Diagnosing the Exact Issue |
| Prevents Overworking HVAC | Need for Technical Knowledge or Professional Help |
| Long-term Cost Savings | Disruption to Daily Routine during Troubleshooting |
Addressing Nest Thermostat cold air issues offers various advantages. Efficient heating control ensures optimal temperature regulation, enhancing comfort at home. Additionally, it brings potential energy savings by preventing unnecessary strain on your HVAC system, leading to long-term cost savings on energy bills.
However, this troubleshooting process can have drawbacks. Repair costs might arise, adding to the overall expense. Troubleshooting itself can be time-consuming and intricate, often challenging to pinpoint the exact issue. Technical knowledge or professional help may be necessary, complicating the process and potentially disrupting your daily routine.
Mastering Nest Thermostat Maintenance
Maintaining your Nest thermostat in top condition doesn’t require complex methods. Here are some simple yet effective tips:
Start with regular cleaning – a simple dust-off can work wonders. Before cleaning, ensure the device is powered off and gently wipe it with a soft, dry cloth. Check for debris or dirt around the unit and clear it delicately.
Firmware updates are crucial. Stay updated with the latest provided by Nest to ensure your thermostat operates efficiently. These updates often bring improvements and bug fixes, enhancing overall performance.
Pay attention to the thermostat’s surroundings. Keep it away from direct sunlight, drafts, or heat-emitting appliances. Maintaining a consistent temperature around the device helps it function optimally.
Lastly, consider an annual check-up. A professional inspection can ensure everything operates smoothly. Technicians can clean internal components and identify any potential issues early on, preventing future problems. By following these maintenance tips, you can easily keep your Nest thermostat in excellent condition! 🌟
Pro Tip: Regular maintenance not only ensures your Nest thermostat operates efficiently but also extends its lifespan, saving you from costly repairs in the long run.
Read also: Dometic Thermostat E1 Code
FAQs
How do I fix my thermostat not cooling?
If your thermostat isn’t cooling, check if it’s set to the right temperature and mode (cooling). Ensure the thermostat’s batteries are functional, the circuit breaker isn’t tripped, and the air filters are clean. If issues persist, consider checking the HVAC system for any malfunctions or contact a professional technician for assistance.
How do I force my Nest thermostat to cool?
To force your Nest thermostat to cool, ensure it’s set to ‘Cool’ mode. You can adjust this setting either on the thermostat itself or through the Nest app. Check the temperature settings to ensure it’s lower than the current room temperature for the cooling to activate.
Why is my AC not cooling to the thermostat setting?
Several factors could cause your AC not to cool to the thermostat setting. It might be due to clogged air filters, refrigerant leaks, a malfunctioning compressor, or improper thermostat settings. Check and replace air filters, inspect for leaks, and ensure the thermostat settings are accurate. If issues persist, consult an HVAC professional for a detailed inspection and repairs.
Why is my Nest thermostat blowing hot instead of cold?
If your Nest thermostat is blowing hot air instead of cold, first, ensure it’s set to ‘Cool’ mode. Verify the temperature settings and try resetting the thermostat. Check if there are any software updates available for the thermostat. If problems persist, there might be issues with the HVAC system compatibility or wiring. Contact Nest support or an HVAC technician for further assistance.
Final thought
At this point, we’ve covered the common causes behind a Nest thermostat not blowing cold air and the potential solutions. We hope this guide has equipped you to troubleshoot and resolve the issue.
If, despite these steps, the problem persists, consider reaching out to a local professional for assistance. They can provide expert insight and help diagnose any underlying issues with your HVAC system.

I’m James Wilson, your HVAC maestro from “Thermostating Hub.” Elevate your comfort with my expertise in heating, ventilation, and air conditioning. Let’s transform your space into a haven of perfect temperatures, tackling HVAC issues with precision and enthusiasm.